
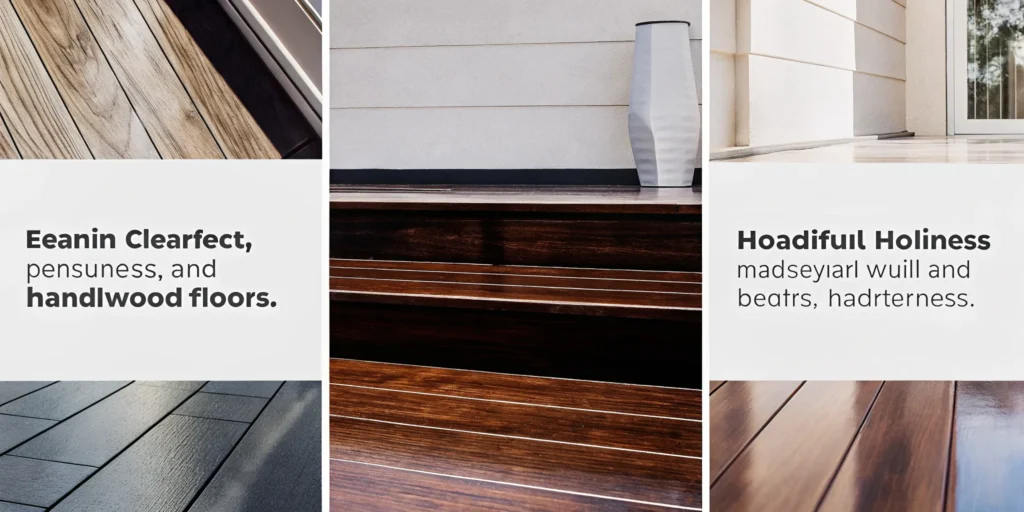
There’s a significant difference between a general contractor who can lay down planks and a dedicated flooring craftsman. A true professional understands that a lasting installation is built on a foundation of details that happen long before the first board is nailed down. They obsess over subfloor flatness, conduct precise moisture tests, and insist on letting the wood acclimate to your home’s unique environment. These non-negotiable steps are what separate a beautiful, stable floor from one that fails prematurely. This guide will teach you how to tell the difference, so you can confidently choose from the many hardwood floor installers and find a true expert who values quality as much as you do.
Key Takeaways
- The installer’s skill matters more than the wood itself: A quality installation is your best defense against future problems like gapping and warping, ensuring your floors look beautiful for years to come.
- Preparation is the most critical step: Before any planks are laid, confirm your installer performs moisture tests, thoroughly inspects the subfloor, and allows the wood to acclimate inside your home.
- Vet your candidates with a simple checklist: Always verify their insurance, ask for a detailed written contract, and check recent customer reviews. A true professional will be transparent and happy to provide this information.
What Does a Hardwood Floor Installer Do?
A professional hardwood floor installer is much more than just a contractor who lays down planks. They are skilled craftspeople responsible for the entire process, from initial assessment to the final finishing touches. Their work ensures your floors are not only beautiful but also durable and correctly installed to last for decades. A true expert manages every technical detail, including subfloor preparation, moisture mitigation, and material acclimation, which are critical for a successful outcome. They handle the complexities so you can simply enjoy your new floors. Understanding the full scope of their services helps you appreciate the value they bring to your home improvement project.
Installing New Hardwood Floors
The most common job for a hardwood installer is, of course, installing new floors. This process is far more involved than it looks. It starts with carefully removing your old flooring and disposing of it properly. Next, they assess and prepare the subfloor, which is the foundation of your new floor. This step might involve leveling, cleaning, or repairing the surface to ensure it’s perfectly flat and stable. A flawed subfloor can lead to squeaks, gaps, and other problems down the road. Finally, they expertly lay the solid wood flooring, cutting each plank to fit precisely around walls, vents, and doorways for a seamless, professional finish.
Refinishing Existing Hardwood
If you have existing hardwood floors that look tired, scratched, or dull, an installer can often bring them back to life through refinishing. This service is a great way to restore the original beauty of your floors without a full replacement. The process involves sanding down the top layer of the wood to remove the old finish and any surface-level imperfections like scratches and minor stains. After sanding, the installer applies a new stain in the color of your choice, followed by several coats of a protective finish. This not only transforms the look of your floors but also adds a durable layer of protection against future wear.
Handling Repairs and Maintenance
Over time, even the most durable hardwood floors can suffer damage. An experienced installer can handle a wide range of repairs to keep your floors in top condition. This could involve replacing a single warped or deeply scratched plank, fixing areas with water damage, or addressing squeaks and gaps that have developed. By making targeted repairs, they can solve problems without requiring you to replace the entire floor. This expertise is essential for maintaining the value and longevity of your engineered wood flooring and preserving the investment you’ve made in your home.
Creating Custom Designs and Inlays
For homeowners looking for something truly unique, some hardwood installers offer custom design services. This can turn a simple wood floor into a stunning focal point for your home. An installer with this skill set can create intricate patterns like herringbone or chevron, add decorative borders around a room, or even install custom inlays and medallions. These artistic touches require a high level of precision and craftsmanship. While not every project calls for this level of detail, knowing an installer has these capabilities is often a good sign of their overall expertise and dedication to their craft.
How to Choose the Right Hardwood Floor Installer
Choosing the right hardwood is only half the battle; the quality of the installation determines how your floors will look and perform for years to come. A great installer protects your investment, while a poor one can lead to frustrating and costly problems down the road. Finding a true professional means looking beyond the quote and evaluating their expertise, credentials, and track record. When you know what to look for, you can confidently hire a team that will get the job done right the first time.
Look for Certifications and Training
While Texas doesn’t require a specific license for flooring installers, you can spot a dedicated professional by looking for industry certifications. Organizations like the National Wood Flooring Association (NWFA) offer rigorous training programs that cover everything from subfloor preparation to moisture testing. An installer who invests in these credentials shows a serious commitment to their craft and stays current on the best installation practices. It’s a clear sign that they value quality workmanship and have the technical knowledge to handle your project correctly, ensuring your new floors are beautiful and durable.
Verify Their Insurance and Licensing
This step is non-negotiable. A reputable flooring installer must carry general liability insurance and workers’ compensation. General liability protects your home from accidental damage during the installation, while workers’ compensation covers their crew in case of injury. Without this coverage, you could be held financially responsible for any mishaps. Don’t just take their word for it; ask to see a certificate of insurance. A professional company will always be prepared to provide this documentation, giving you the peace of mind that you and your property are protected throughout the project.
Check Reviews and Past Work
Before you hire anyone, do a little digging to see what past customers have to say. Check online reviews on sites like Google to get a feel for their reputation in the Dallas-Fort Worth area. Are clients happy with the final result? Do they mention good communication and a professional crew? Beyond reviews, ask to see a portfolio of their recent projects. Seeing their work will give you a clear idea of their skill level and attention to detail, helping you feel confident in their ability to bring your vision to life.
Gauge Their Expertise on Materials and Moisture
A true flooring expert understands that wood is a natural material that responds to its environment, especially the humidity here in Texas. Your installer should be knowledgeable about how to manage moisture to prevent future issues like gapping, cupping, or warping. Ask them about their process for moisture testing both the subfloor and the new hardwood. They should also insist on letting the wood acclimate inside your home before installation. This critical step allows the planks to adjust to your home’s temperature and humidity, ensuring a stable and long-lasting fit.
Understanding Your Hardwood Installation Quote
An installation quote is more than just a final number; it’s a roadmap for your project. A detailed estimate helps you understand exactly what you’re paying for, from the materials to the labor and any extra prep work involved. When you get a quote from a professional installer, it should clearly outline every step of the process. This transparency is key to avoiding surprises and ensuring you feel confident in your investment. Let’s break down the common components you’ll see in a hardwood flooring estimate so you know what to look for.
How Your Installation Quote Is Calculated
Most installers calculate the total project cost on a per-square-foot basis. This figure bundles the expense of the hardwood itself with the labor required for installation. Think of it as a baseline that covers the two biggest components of the job. For example, if your room is 200 square feet, the installer will multiply that by their combined rate for materials and labor to get a starting figure. A clear, all-in-one number per square foot makes it easier to compare different materials and understand the overall scope of your project from the get-go.
Key Factors That Affect Your Final Quote
Several variables can influence the final amount on your estimate. The type of wood you choose is a major factor; solid hardwood often has a different material cost than engineered wood. The complexity of the room’s layout also matters. A simple, square room is more straightforward to install than a space with lots of corners, stairs, or custom inlays. Finally, the condition of your subfloor is critical. If it needs repairs or leveling before the new wood can go down, that will be reflected in the quote.
Breaking Down Material and Labor
Your quote will generally have two main categories: materials and labor. The material portion covers the actual wood planks. This amount can vary significantly depending on the species (like oak versus walnut), plank width, and finish. The labor portion covers the installer’s time, skill, and the physical work of laying the floor. While it might be tempting to find the lowest labor rate, remember that experienced craftsmanship is what ensures your floors look beautiful and perform well for years. It’s an investment in a job done right the first time.
What About Additional Services or Fees?
A thorough quote will also account for any extra work needed to complete the job properly. This can include tearing out and disposing of old flooring, moving heavy furniture, or making significant repairs to the subfloor. Some projects may also require new baseboards or trim to be installed. A professional installer will identify these needs during your initial consultation. When you request an in-home estimate, be sure to ask what’s included so there are no unexpected additions to your final bill.
What to Expect During the Installation Process
Once you’ve chosen your installer, the real work begins. A professional hardwood installation is a multi-step process that prioritizes preparation just as much as the final placement of the planks. Understanding these steps helps you know what’s happening in your home and why each stage is so important for a beautiful, long-lasting floor. While every project in the Dallas–Fort Worth area has its own unique challenges, a quality installation generally follows a predictable and thorough path.
From the initial assessment to the final board, a true professional focuses on getting the foundation right. This means checking for moisture, ensuring your subfloor is in great shape, and giving the wood time to adjust to your home’s environment. Rushing these early stages can lead to major headaches down the road, so a methodical approach is always the best bet. Here’s a breakdown of what you can expect from a professional installation.
The Initial Consultation and Moisture Test
The process kicks off with an in-home consultation. This is when an expert comes to your home to see the space, take precise measurements, and discuss your vision. It’s also the first and most critical checkpoint for moisture. Using a professional moisture meter, the installer will test the subfloor and the general humidity in the room. Because excess moisture is one of the biggest threats to hardwood, this step is non-negotiable. A skilled professional can identify and plan for any potential issues from the very beginning, ensuring a smooth project. This initial meeting is the perfect time to ask questions and get a clear plan before any work starts.
Preparing and Assessing Your Subfloor
Your new hardwood floors will only be as good as the foundation they’re installed on. That foundation is the subfloor, the surface beneath your flooring. Before any new wood is laid, your installer will thoroughly inspect the subfloor to make sure it’s clean, flat, and structurally sound. Any squeaks, dips, or damage must be fixed first. If the subfloor is concrete, it needs to be properly sealed and tested for moisture. If it’s wood, it needs to be level and secure. Skipping this step is a recipe for disaster, leading to uneven floors, creaking boards, and other problems. A great installer spends the necessary time here to guarantee a flawless finish.
Why Your New Wood Needs to Acclimate
Wood is a natural material that breathes, meaning it expands and contracts with changes in temperature and humidity. Acclimation is the process of letting your new hardwood planks sit inside your home for several days before installation. This allows the wood to adjust to your home’s unique climate. Your installer will have you run your HVAC system as you normally would during this period. This simple step is crucial for preventing gaps, warping, or cupping after the floor is installed. It ensures the wood is stable and won’t dramatically shift once it’s all locked into place, giving you a floor that stays beautiful for years.
A Step-by-Step Installation Timeline
While the exact timeline depends on the size and complexity of your project, a typical installation follows a clear sequence. After the subfloor is prepped and the wood is acclimated, the physical installation begins. This involves laying out the planks, making precise cuts to fit around walls and doorways, and securing the boards to the subfloor. Your installer will communicate the expected duration during your initial consultation. While our team at Next Day Flooring is known for efficiency, we never compromise on craftsmanship. Each installation is treated as a custom job, ensuring every detail is handled correctly for a durable and stunning result.
Key Questions to Ask a Potential Installer
Choosing an installer is a big decision, and you have every right to be thorough. Think of this as an interview for a very important job: transforming your home. A true professional will welcome your questions and provide clear, confident answers. Asking the right things upfront helps you gauge their expertise, sets clear expectations, and ensures there are no surprises down the road. It’s the best way to find a partner you can trust to handle your flooring project correctly from start to finish.
Ask About Their Experience and Credentials
You wouldn’t hire an electrician who isn’t licensed, and the same standard should apply to your flooring installer. Start by asking about their specific experience with hardwood floors. How many years have they been in business? Can they show you a portfolio of completed projects in the Dallas–Fort Worth area?
Go a step further and inquire about professional qualifications. Certifications from organizations like the National Wood Flooring Association (NWFA) show a commitment to staying current with industry best practices. Also, always confirm they are fully licensed and insured. This protects you and your home in case of accidents. A contractor who invests in their credentials and training is one who takes their craft seriously.
Clarify the Timeline and Process
A clear plan is a sign of a well-organized professional. Ask your potential installer to walk you through their entire process, from start to finish. What does subfloor preparation involve? How long will the wood need to acclimate in your home before installation begins? A detailed timeline helps you prepare your household and minimizes disruption.
You should also ask how they manage the project and who your main point of contact will be. Find out how they handle unexpected issues, like discovering subfloor damage. Understanding their installation workflow ahead of time prevents miscommunication and helps ensure the project runs smoothly. A good installer will be transparent about every step.
Understand Their Warranty and Guarantees
Your new hardwood floors are a significant investment, so they should be protected. It’s important to understand the difference between two types of warranties: the manufacturer’s warranty, which covers defects in the flooring material itself, and the installer’s workmanship warranty, which covers the quality of the installation.
Ask potential installers for detailed information about their workmanship guarantee. What exactly does it cover, and for how long? Is it transferable if you sell your home? Get the terms in writing so you know what to expect. A contractor who stands behind their work with a solid warranty gives you peace of mind that you’re getting a floor built to last. You can often find answers to these questions on a company’s FAQ page.
Review the Contract and Payment Schedule
Never move forward without a detailed, written contract. This document should clearly outline the full scope of the project, including the specific materials being used, a breakdown of labor and material costs, and the project timeline. It should also list everything included in the service, from furniture moving to old floor removal and cleanup.
Pay close attention to the payment schedule. A common red flag is a contractor who asks for a large deposit upfront. A reasonable request is typically 10% to 30% to secure materials. The contract should specify when subsequent payments are due, usually tied to project milestones. Before signing, read everything carefully and make sure you’re comfortable with the terms. When you’re ready, you can request a detailed estimate to review.
Common Installation Problems to Watch For
A new hardwood floor is a significant investment, and the last thing you want is to see it fail because of a shoddy installation. While hardwood is incredibly durable, it’s also a natural material that reacts to its environment. Most major flooring issues aren’t caused by the wood itself, but by mistakes made during the installation process. Knowing what to look for can help you spot a red flag before it becomes a permanent problem in your home.
A professional installer understands that the real work happens before the first board is even laid. They focus on preparation, moisture management, and patience. When these steps are rushed or skipped, the results can be disastrous and costly to fix. From unsightly gaps to warped boards, these common problems are almost always preventable. Here’s what you need to watch out for.
Gapping, Cupping, and Warping
Have you ever seen a wood floor with noticeable spaces between the planks? That’s called gapping. Cupping is when the edges of a board are higher than its center, creating a concave shape. Warping is even more severe, causing the wood to twist and lift. These issues occur when wood expands or contracts due to changes in moisture and temperature. While some minor seasonal gapping can be normal, significant and permanent changes often point to an installation error. A skilled installer knows how to account for wood’s natural movement, ensuring the final floor is stable and beautiful for years to come. This is especially important for the solid wood flooring popular in many Dallas-Fort Worth homes.
Signs of Moisture Damage
Moisture is the number one enemy of hardwood floors. If it’s not properly managed, it can lead to all the problems we just discussed, plus discoloration and mold. A true professional will always perform moisture tests on both your subfloor and the new wood planks before starting work. This is a critical step that should never be skipped. An installer who ignores moisture readings is taking a huge risk with your investment. They should also use the correct underlayment as a vapor barrier to protect your floors from any moisture coming up from the subfloor. Understanding how wood reacts to moisture is a key part of a successful installation.
The Dangers of a Poorly Prepped Subfloor
Think of your subfloor as the foundation for your new hardwood. If that foundation isn’t perfectly clean, flat, and structurally sound, it will cause problems for the floor above it. An uneven subfloor can create hollow spots, squeaks, and uneven planks that wear down prematurely. A professional installer will spend a significant amount of time preparing the subfloor, which might involve sanding down high spots, filling in low spots, and ensuring it’s completely free of debris. Rushing this step is a classic shortcut of an inexperienced installer. Our team at Next Day Flooring believes that proper prep is the most important part of any installation, because it guarantees a durable, long-lasting result.
What Happens When Wood Isn’t Acclimated
Wood needs time to adjust to its new home before it’s installed. This process is called acclimation. It involves letting the new flooring sit in the room where it will be installed for several days, with your HVAC system running normally. This allows the wood’s moisture content to stabilize with the home’s unique temperature and humidity levels. If an installer tries to lay the flooring the same day it’s delivered, that’s a major red flag. Skipping acclimation almost guarantees that the wood will expand or shrink after installation, leading directly to the gapping and warping you want to avoid. It’s a simple step that demonstrates an installer’s commitment to getting the job done right.
How to Avoid Common Hiring Mistakes
Choosing the right installer is just as important as picking the perfect hardwood. A great installation ensures your floors will look beautiful for years, while a poor one can lead to headaches and costly repairs. By being mindful of a few common pitfalls, you can hire a professional for your Dallas–Fort Worth home with confidence.
Don’t Just Go for the Lowest Quote
It’s tempting to jump on the lowest offer, but an unusually low quote can be a red flag. Often, it means corners are being cut somewhere, whether in subfloor preparation, material quality, or the skill of the installation team. A professional quote accounts for the time and materials needed to do the job correctly from the start. Think of it as an investment in your home’s long-term value. A quality installation from a team that values craftsmanship prevents issues like gapping and warping down the road, saving you money and stress.
Always Verify Credentials and Check References
Before letting anyone work in your home, make sure they are properly insured. This protects you from liability in case of accidents or property damage. Don’t be shy about asking for proof of insurance; a reputable contractor will have it ready. Beyond the paperwork, look for evidence of their work. Check online reviews, browse their project gallery, and ask for references from recent jobs. A contractor with a solid history of satisfied customers is proud to share their track record and demonstrate their expertise.
Insist on a Detailed, Written Estimate
A professional estimate is more than just a final number. It should be a clear, itemized document that breaks down every aspect of the project. Look for details on the cost of materials, labor charges, subfloor prep, removal and disposal of your old flooring, and any additional fees. This transparency helps you understand exactly what you’re paying for and prevents surprise costs later. A detailed estimate is a sign of a thorough and honest installer, allowing you to schedule a consultation with a clear understanding of the scope of work.
Read the Fine Print in Your Contract
The contract is your final agreement, so review it carefully before signing. It should clearly outline the project timeline, payment schedule, and specific materials being used. Be cautious of requests for large upfront deposits; a standard down payment is typically between 10% and 30% to secure materials. The contract should also include warranty information for both the flooring materials and the installation itself. Understanding these details ensures that you and your installer are on the same page from day one, leading to a smooth and successful project.
How to Prepare Your Home for New Floors
Once you’ve chosen your beautiful new hardwood, a little preparation can make the installation process seamless. Taking a few simple steps before the installation crew arrives helps them work efficiently and protects your belongings. A well-prepared space ensures your project stays on schedule and that your new floors get the clean start they deserve. Think of it as rolling out the welcome mat for your new flooring. A clear room and easy access allow our team to focus entirely on what we do best: installing your floors with precision and care.
Clear the Room and Remove Furniture
Before installation day, the rooms receiving new flooring need to be completely empty. This includes removing all furniture, rugs, plants, and wall hangings. Don’t forget to clear out closets if they are part of the project. While our installation team can often help with large, heavy items like sofas or beds, it’s always best to confirm this ahead of time. Clearing smaller items and personal belongings yourself helps the installation start right on schedule. If you have any questions about moving specific pieces of furniture, it’s a good idea to get in touch with your installer beforehand to coordinate a plan.
Ensure Easy Access for the Installers
Your installation team needs a clear path to bring in tools and materials. Start by clearing a walkway from the driveway or street to the installation area. This means moving any vehicles, outdoor furniture, or toys that might be in the way. Inside, make sure hallways and entryways are free of clutter. A clear path not only makes the work faster but also helps prevent accidental damage to your home or the new flooring. For everyone’s safety, it’s also important to keep children and pets away from the work area throughout the installation process.
Control Your Home’s Climate for Acclimation
Wood is a natural material that expands and contracts with changes in temperature and humidity. To prevent future issues like gapping or warping, your new solid wood flooring needs to acclimate to your home’s environment. Your installer will deliver the wood a few days early so it can adjust. During this time, and throughout the installation, maintain a consistent indoor temperature, typically between 60 and 80 degrees Fahrenheit. Running your HVAC system as you normally would is usually all it takes. This simple step is one of the most critical for ensuring the long-term stability and beauty of your hardwood floors.
Where to Find a Qualified Hardwood Floor Installer
Finding the right installer is the most important step in getting beautiful, long-lasting hardwood floors. A great installation can make even mid-range materials look stunning, while a poor one can ruin the highest-quality wood. The good news is that finding a true professional in the Dallas–Fort Worth area is straightforward when you know where to look and what to ask. It’s not about finding just anyone to do the job; it’s about finding a partner you can trust to protect your investment and treat your home with respect.
Check Professional Flooring Associations
A great starting point is to look for installers who are members of professional organizations. The most respected in our industry is the National Wood Flooring Association (NWFA). Membership isn’t just a sticker on a van; it shows a contractor is serious about their craft. These organizations provide ongoing training and hold their members to strict installation standards. An installer with an NWFA certification has proven their knowledge of everything from subfloor prep to finishing techniques. This commitment to best practices is a strong indicator that they prioritize quality and durability over cutting corners.
Use Online Reviews and Local Recommendations
Word-of-mouth is powerful, so start by asking friends, family, or neighbors in your community for recommendations. Beyond personal referrals, online reviews offer a window into a company’s performance. Look at Google, Yelp, and other local directories, but read beyond the star ratings. Look for comments that mention professionalism, communication, and how the team handled challenges. Testimonials that highlight craftsmanship and customer service are far more telling than a simple low quote. A pattern of positive feedback about a company’s process and results is a clear sign you’re on the right track.
How to Vet Your Top Candidates
Once you have a short list, it’s time to dig a little deeper. The first step is to confirm that any potential installer is fully insured. This protects you and your home in case of an accident. Don’t be shy about asking for proof of insurance. Next, ask about their specific experience with the type of flooring you want, whether it’s solid wood flooring or engineered hardwood. A qualified professional will be happy to show you a portfolio of their work and may even provide references from recent clients. This vetting process helps ensure you’re hiring a true expert, not just a general contractor.
Related Articles
Frequently Asked Questions
Besides the wood itself, what other factors affect my final quote? Your final quote reflects the entire scope of the project, not just the materials. Key factors include the condition of your subfloor, as any necessary leveling or repairs will be accounted for. The complexity of the room’s layout also plays a role; a space with many corners, stairs, or custom patterns requires more intricate work than a simple square room. Finally, the quote includes the skilled labor needed for tear-out of old flooring, precise installation, and a clean finish.
How long does a typical hardwood installation take from start to finish? The timeline can vary depending on the size of your project. A crucial part of the process is acclimation, where the wood needs to sit in your home for several days to adjust to the climate before installation can even begin. Once the work starts, a straightforward project might take just a few days. During your in-home consultation, your installer will assess the space and give you a much more specific and reliable timeline for your project.
Why is hiring a professional installer so important for hardwood floors? Hardwood is a natural material that responds to its environment, and a professional installation accounts for that. An expert handles critical steps that protect your investment, like conducting moisture tests, properly preparing the subfloor, and leaving the correct amount of space for the wood to expand and contract naturally. These technical details prevent common issues like gapping, squeaking, and warping, ensuring your floors look beautiful and perform correctly for decades.
What is “acclimation” and why does my installer insist on it? Acclimation is the essential process of letting your new hardwood planks adjust to your home’s specific temperature and humidity levels before they are installed. Wood naturally expands and contracts, and this step ensures the material is stable before it’s secured to your subfloor. Skipping it is a major cause of future problems like buckling or gapping. A professional who insists on acclimation is showing a commitment to a durable, high-quality result.
Do I need to move all my furniture before the installation team arrives? Yes, the rooms receiving new flooring should be completely empty to allow the installers to work safely and efficiently. You should plan to remove all furniture, rugs, and personal items from the space beforehand. Many installation companies can assist with moving larger, heavier pieces, but it’s always best to discuss this during your consultation to coordinate a plan and ensure everything is ready for installation day.