
In North Texas, our homes deal with unique challenges, from dramatic humidity swings to active clay soil that can cause foundations to shift. These environmental factors have a direct impact on natural materials like wood, making a professional solid hardwood floor installation especially critical. An expert approach accounts for our local climate by ensuring proper acclimation, using the right moisture barriers, and leaving adequate room for the wood to expand and contract. This guide explains the specific techniques required for a successful installation in the Dallas-Fort Worth area, ensuring your new floors not only look incredible but are also built to withstand our region’s demands.
Key Takeaways
- A Great Floor Starts with a Great Foundation: The most critical steps are acclimating the wood to your home’s unique climate and ensuring the subfloor is perfectly flat to prevent future issues like gaps or squeaks.
- Professional Technique Prevents Future Headaches: Small details, like using the right L-cleat nails instead of staples and leaving a proper expansion gap, are what keep your floors quiet, stable, and beautiful for years.
- Match Your Floor to Your Life, Not Just Your Style: Consider your family’s foot traffic, our North Texas climate, and your timeline to decide on the right wood species and whether prefinished or unfinished planks are the best fit.
What You’ll Need for Hardwood Installation
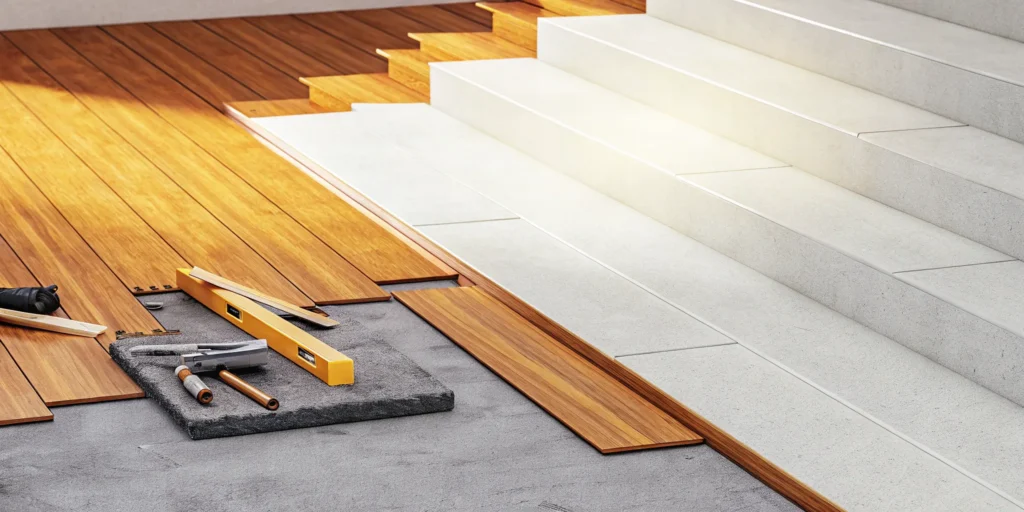
Installing solid hardwood floors correctly requires more than just the wood planks themselves. A professional job depends on having a specific set of tools and materials ready to go. If you’re curious about what it takes to get that seamless, long-lasting finish, here’s a look at the equipment our team uses for every solid wood flooring project in the Dallas–Fort Worth area. It’s this combination of specialized gear and expertise that ensures your floors not only look beautiful but also stand the test of time.
Essential Power Tools
Power tools are the heavy lifters of any flooring installation. To get clean cuts and secure planks, you’ll need a miter saw for precise angles, especially for pieces that meet walls and door frames. A table saw is also incredibly helpful for making long, straight cuts, known as rip cuts, for the planks that run parallel to the walls. Most importantly, a pneumatic flooring nailer and an air compressor are non-negotiable. This duo drives the fasteners into the wood at the perfect angle and depth without damaging the planks, which is something a standard hammer and nails simply can’t do.
Must-Have Hand Tools and Accessories
Beyond the big power tools, a collection of hand tools and accessories is just as important for a quality installation. You’ll need a tape measure, chalk line, and jamb saw for trimming door casings. A professional installer will almost always use a flooring nailer that uses L-cleat nails instead of a stapler. While staples can work for some softer woods, L-cleats provide a much stronger hold, which is critical for the harder wood species we often install in Dallas-area homes. This small detail makes a huge difference in preventing squeaks and movement down the road.
Key Materials and Supplies
The star of the show is, of course, the hardwood itself. For a standard 3/4-inch solid hardwood installation, the go-to fasteners are 2-inch, 16-gauge L-cleat nails. Using the right size and type of nail ensures the planks are securely fastened to the subfloor without splitting the tongue. You’ll also need underlayment, like roofing felt or rosin paper, which acts as a moisture vapor barrier and helps reduce friction between the subfloor and the new hardwood. Having all the right flooring materials on hand before starting is key to a smooth and efficient installation process.
How to Prep Your Room for New Floors
A beautiful hardwood floor starts long before the first plank is nailed down. Proper preparation is the single most important factor in getting a durable, long-lasting result you’ll love for years. Skipping these steps can lead to frustrating issues like gaps, squeaks, and buckling down the road. By taking the time to get the room ready, you’re setting the stage for a smooth installation and a flawless finish. Here’s a look at the three key prep stages our team focuses on for every project.
Acclimate Your Hardwood Planks
Solid hardwood is a natural material, which means it breathes—expanding and contracting with changes in temperature and humidity. That’s why acclimation is a non-negotiable first step. It simply means letting the new wood planks sit inside the room where they’ll be installed for several days before we begin. This gives the wood time to adjust to your home’s unique climate. Rushing this process is a common cause of gapping or buckling later on. Properly acclimated solid wood flooring will be stable and secure, ensuring it performs beautifully for decades in your Dallas-Fort Worth home.
Inspect and Prepare the Subfloor
Your new hardwood is only as good as the foundation it rests on. Before any planks are laid, the subfloor must be clean, dry, and perfectly flat. Even minor bumps or dips can create problems, leading to hollow spots, annoying squeaks, and uneven wear over time. Preparing the subfloor can be one of the most challenging parts of the job, often requiring grinding down high spots or using a leveling compound to fill in low areas. Our hands-on industry experience has taught us that a perfectly prepped subfloor is the secret to a quiet, solid, and professional-feeling floor that stands the test of time.
Plan Your Room’s Layout
Once the wood is acclimated and the subfloor is ready, it’s time to plan the layout. We don’t just start laying boards from one corner. Instead, we open several boxes at once and arrange the planks on the floor. This process, known as racking, allows us to create a visually appealing and natural pattern. We mix boards of different lengths, colors, and grain variations to avoid awkward clusters or repetitive patterns. This careful planning ensures the final floor looks balanced and intentional. It’s a critical step in our installation services that transforms a simple collection of planks into a cohesive, beautiful surface that complements your entire room.
Prefinished vs. Unfinished: Which Hardwood Is Right for You?
One of the biggest decisions you’ll make when choosing solid hardwood is whether to go with prefinished or unfinished planks. Prefinished hardwood arrives from the factory already sanded, stained, and sealed with multiple protective coats. Unfinished hardwood is raw wood that gets installed first, then sanded and finished on-site. While both result in a beautiful floor, the installation process, timeline, and final look are quite different. Understanding these differences is key to selecting the right option for your home, your timeline, and your long-term satisfaction.
For most homeowners in the Dallas–Fort Worth area, the choice comes down to balancing convenience with customization. Let’s break down the pros and cons of each so you can feel confident in your decision.
The Pros and Cons of Prefinished Hardwood
Prefinished hardwood is the go-to choice for speed and durability. Because all the finishing work is done in a controlled factory environment, the final product has an incredibly tough, even coating that’s often stronger than what can be applied in a home. This means your floors are ready to walk on almost immediately after installation, minimizing disruption to your life. The process is also much cleaner, with no dust from sanding or fumes from sealants. The main trade-off is that prefinished boards have a beveled edge, creating subtle grooves between planks. While this is a stylistic choice for some, it’s a point to consider. Spot repairs can also be more challenging than with a site-finished floor.
The Pros and Cons of Unfinished Hardwood
If you’re looking for a completely custom look, unfinished hardwood offers unmatched flexibility. You can choose a unique stain to perfectly match your cabinetry or create a one-of-a-kind color. Once installed, the entire floor is sanded smooth, creating a seamless, flat surface from wall to wall. This method is also ideal for matching existing hardwood in other parts of your home. However, the process is significantly more involved. It requires several days for sanding, staining, and applying multiple coats of finish, with drying time needed between each step. The sanding process creates a lot of dust, and the fumes from the finish can be strong, requiring you to stay out of the area.
How to Decide What’s Best for Your Home
Your final choice depends on your priorities. If your main goal is to get beautiful, durable floors installed with minimal downtime, prefinished solid wood flooring is almost always the better option. It’s the reason we can deliver high-quality results so quickly. If, however, you need a specific custom color or a perfectly flat, seamless surface, unfinished hardwood might be the right path, as long as you can accommodate the longer project timeline. We can help you weigh these factors during an in-home estimate, where we’ll assess your subfloor, discuss your lifestyle, and recommend a solution that truly fits your home.
A Step-by-Step Guide to Installing Hardwood Floors
Installing hardwood floors is a craft that blends precision with patience. While every room has its unique challenges, the fundamental steps for a professional installation remain the same. Understanding what goes into a quality job can help you appreciate the final result, whether you’re watching an expert at work or just curious about the process. From the first board to the final piece of trim, each step builds on the last to create a beautiful, durable surface that will last for decades. Here’s a look at how the pros transform a prepared subfloor into a stunning hardwood masterpiece.
Lay the Critical First Row
The first row of hardwood is the foundation for the entire floor. If it isn’t perfectly straight, every subsequent row will be slightly off, creating noticeable gaps and crooked lines. That’s why installers always begin along an exterior wall, which is typically the straightest line in the room. A chalk line is snapped to create a flawless guide. For extra stability, a “glue-assist” method is often used for the first few rows. This involves applying a flexible, polyurethane-based adhesive to the subfloor before nailing the boards, giving these crucial starter rows an exceptionally strong bond that prevents any shifting over time.
Continue Installing Subsequent Rows
With the first row securely in place, the rest of the floor can be laid. Installers work from left to right, fitting the tongue of each new board into the groove of the previous one. It’s crucial to install the planks perpendicular to the floor joists (the support beams under the subfloor). Laying the boards across the joists provides the structural support needed to prevent the floor from sagging or developing a “belly effect” down the line. This is one of those non-negotiable rules of a quality hardwood floor installation that ensures your floor remains flat and stable for years to come.
Master Your Nailing Technique
Securing the planks correctly is what keeps a hardwood floor tight and quiet. While some might use staplers, professional installers almost always use a flooring nailer with L-cleat nails. Cleats provide a much stronger hold, pulling the board tightly against both the subfloor and the adjoining plank. This is especially important for harder woods like hickory, which can be dense enough to jam a stapler. The right technique ensures each board is fastened securely without damaging the wood, creating a seamless surface that can withstand daily foot traffic and seasonal changes without creaking or separating.
Add the Finishing Touches and Trim
The final steps are what give the room a polished, complete look. The last row of boards often needs to be cut to a specific width to fit against the wall. Once it’s in place, baseboards and quarter-round molding are installed to cover the expansion gap left around the room’s perimeter. This gap is essential, as it allows the wood to expand and contract naturally with changes in humidity. Finally, transition strips are fitted in doorways to create a smooth connection to the flooring in the next room. When it’s all done, you’re left with a beautiful floor that truly transforms the space.
How to Handle Common Installation Challenges
Even with careful planning, installing solid hardwood floors comes with a few tricky spots. From uneven subfloors to intricate cuts, these hurdles can test your patience. But knowing what to expect and how to approach these common issues is half the battle. Getting these details right is what separates a decent floor from a stunning one that lasts for decades. It’s all about taking your time, using the right techniques, and understanding why each step matters for the final result.
Working with an Uneven Subfloor
Many installers will tell you that preparing the subfloor is often the most challenging part of the job. An uneven surface can cause your beautiful new hardwood to squeak, shift, or develop gaps over time. In the Dallas-Fort Worth area, foundation settling can create subtle dips and high spots that need to be addressed before a single plank is laid. The goal is a perfectly flat and level foundation. This usually involves grinding down high areas and filling low spots with a leveling compound. It’s a dusty, meticulous process, but it’s absolutely essential for a professional-quality solid wood floor installation.
Making Tricky Cuts Around Doorways
Navigating around door casings, vents, and built-ins requires precision. To keep everything looking clean and aligned, it’s best to start your first row of flooring along a straight exterior wall. You can snap a chalk line to ensure that initial row is perfectly straight, as it will guide the rest of the installation. For doorways, the cleanest look comes from undercutting the door jambs. This involves using a small saw to trim the bottom of the casing, allowing you to slide the flooring plank underneath instead of cutting the plank around it. This technique creates a seamless, built-in appearance that hides the cut edge of the wood.
Preventing Gaps and Buckling
Solid hardwood is a natural material that breathes. It expands and contracts with changes in temperature and humidity—a constant factor in North Texas. To account for this movement, you need to leave a small expansion gap around the perimeter of the room. A good rule of thumb is to make the gap as wide as your flooring is thick. This space gives the wood room to swell in humid months without buckling or pushing against the walls. Don’t worry, this gap won’t be visible. It gets completely covered by baseboards and shoe molding, giving you a polished look while allowing your floor to move naturally.
Solving Moisture-Related Problems
Moisture is the biggest enemy of a hardwood floor. That’s why it’s so important to let the wood acclimate to your home’s environment before installation. This process allows the moisture content of the planks to adjust to the “normal living conditions” inside your house, preventing shrinking or swelling after they’re nailed down. We also recommend installing a moisture barrier, especially over concrete slab foundations common in DFW homes. This barrier blocks moisture from wicking up from the subfloor and damaging the wood from below. Skipping these steps can lead to frustrating issues like cupping or warping down the road, so proper moisture management is key to a long-lasting floor.
How to Choose the Perfect Hardwood for Your Home
Selecting the right hardwood floor goes far beyond picking a color you like. It’s about choosing a material that will stand up to your daily life and look beautiful for years to come. Think of it as a long-term investment in your home’s comfort and character. The perfect hardwood is one that complements your decor, handles your household’s activity level, and suits the unique climate here in the Dallas–Fort Worth area.
Making the right choice from the start prevents future headaches like premature wear, scratches, or warping. To find the best fit, you need to consider three key factors: the wood species and its durability, how the wood will react to our local climate, and how it aligns with your family’s lifestyle. By thinking through these elements, you can confidently select a solid wood floor that you’ll love from day one. Let’s walk through what you need to know to make a smart decision for your home.
Match the Wood Species to Your Foot Traffic
The first step is to be realistic about how you use your space. A floor in a busy entryway or kitchen needs to be much tougher than one in a quiet guest bedroom. Different wood species have different levels of hardness, which directly impacts how well they resist dents and scratches. For the most active areas of your home, you’ll want a durable wood that can handle the constant movement.
For high-traffic zones, hardwood experts recommend species like oak and maple for their resilience. They are hard enough to withstand daily wear from kids, pets, and frequent guests. Softer woods, like walnut, offer a rich, luxurious look but are better suited for moderate-traffic areas like a home office or formal dining room where they are less likely to get dented.
Consider Your Home’s Climate
Wood is a natural material that expands and contracts with changes in humidity and temperature. Here in North Texas, we see our fair share of humid summers and dry winters, and your flooring will react to those shifts. This is why choosing a wood that can handle our climate is so important for preventing issues like gapping or buckling down the road.
In climates with significant humidity swings, solid hardwood is often recommended because it can adapt to its environment. Proper acclimation—letting the wood planks sit in your home for several days before installation—is a critical step that allows the material to adjust to your home’s specific temperature and moisture levels. This ensures a stable, long-lasting fit.
Find a Floor That Fits Your Lifestyle
Ultimately, the best hardwood floor is one that works for you, not the other way around. Your lifestyle should be a major factor in your decision. Do you have large dogs whose claws might scratch a softer finish? Are young children part of the picture, making spills and scuffs a daily reality? Or do you live in a quiet, adults-only household where a more delicate wood would be perfectly fine?
A floor that truly fits your home considers everything from the local climate to your subfloor type. Also, think about maintenance. Some finishes are easier to touch up than others, while certain wood grains and colors are better at hiding dust and pet hair. Being honest about your daily routines and how much upkeep you’re willing to do will help you choose a floor that remains a source of pride, not stress.
Caring for Your New Hardwood Floors
Your beautiful new hardwood floors are installed, and your home feels completely transformed. Now, the goal is to keep them looking just as good as they do today. Proper care doesn’t have to be complicated, but it does require a little know-how. By following a few simple guidelines, you can protect your investment and ensure your floors stay stunning for years to come. Think of it less as a list of chores and more as a routine to preserve the warmth and character you just added to your home.
The right maintenance plan starts from day one and continues with a consistent cleaning schedule. It’s also about knowing what not to do—like avoiding harsh chemicals or excessive water, which can damage the wood’s finish and integrity. We’ll walk through everything you need to know, from those first crucial hours after installation to the best long-term care strategies. With the right approach, your solid wood flooring will not only last but will also develop a rich patina over time, adding even more value and personality to your space.
What to Do Immediately After Installation
The first 24 to 48 hours are critical for your new floors. Although the finish is durable, it needs time to fully cure and harden. Give it that time by waiting at least a full day before walking on it with anything other than socks. Hold off on moving heavy furniture back into the room for as long as the manufacturer recommends—usually a few days. When you do bring furniture in, don’t drag it. Lift and place each piece carefully, and apply felt pads to the bottom of all chair legs, tables, and sofas. This simple step is your best defense against scratches and gouges. Also, keep your pets’ nails trimmed to prevent accidental scratches as they get used to the new surface.
Your Long-Term Maintenance Plan
One of the best things about solid hardwood is its longevity. Unlike other flooring types, it can be sanded and refinished multiple times throughout its life, allowing you to erase years of wear and tear or even change the stain color for a fresh look. This makes it a truly sustainable and adaptable choice for your home. To protect this long-term value, it’s important to maintain the manufacturer’s warranty. Many warranties specify that the floors must be installed by a certified professional. A proper professional installation not only ensures your floors perform as they should but also keeps your warranty intact, giving you peace of mind.
The Best Cleaning Products and Methods
When it comes to cleaning, less is more. For daily upkeep, a quick sweep with a soft-bristle broom or a dry microfiber dust mop is all you need to pick up dirt and dust that can scratch the finish. For a deeper clean, use a pH-neutral cleaner specifically designed for hardwood floors. The key is to avoid using too much water. Never wet-mop your hardwood floors. Instead, lightly mist a small section of the floor with the cleaner and immediately wipe it with a microfiber mop. According to the National Wood Flooring Association, you should avoid using vinegar, ammonia, or oil-based soaps, as these can dull or damage the finish over time.
Know When to Call a Professional Installer
There’s a certain satisfaction that comes from completing a home project yourself. But when it comes to installing solid hardwood floors, it’s important to be realistic about the skill, tools, and time required. This isn’t just a cosmetic update; it’s a major structural addition to your home. An improper installation can lead to costly repairs, wasted materials, and a floor that never quite looks or feels right.
Deciding to hire a professional isn’t about giving up—it’s about protecting your investment and ensuring the final result is something you’ll be proud of for decades. For many Dallas–Fort Worth homeowners, the peace of mind that comes with an expert installation is well worth it. A pro handles the complexities so you can simply enjoy your beautiful new floors without the stress.
Signs Your Project Requires an Expert
So, how do you know when to step back and let an expert take over? Certain signs make the decision clear. First, consider the material itself. Solid hardwood flooring is notoriously tricky to install correctly, as each plank must be perfectly placed and secured to prevent gaps and buckling down the road.
Next, take a hard look at your space. If your room has irregular angles, multiple doorways, or needs to transition smoothly into another flooring type like tile or carpet, the complexity increases exponentially. Finally, be honest about your experience. If this is your first major flooring project, the learning curve can be steep and unforgiving. Mistakes with hardwood are often difficult and expensive to fix.
When to Save Time and Ensure Quality
Beyond the obvious challenges, hiring a professional is often the best way to guarantee a beautiful, long-lasting result. A flawless finish starts with a perfect foundation, and many DIYers find that preparing the subfloor is the most difficult part of the job. A professional installer has the specialized equipment and expertise to ensure your subfloor is perfectly clean, flat, and dry—preventing future squeaks, gaps, and warping.
A professional installation is a careful process that combines good planning with precise techniques to create a durable, stunning floor. It saves you from the frustration of unexpected problems, the cost of wasted materials, and the stress of a project that takes weeks instead of days. When you want the job done right and right away, calling an expert is the smartest move.
Related Articles
Frequently Asked Questions
Why does my new hardwood need to sit in my house for a few days before you install it? Think of solid wood as a natural material that breathes. It needs time to adjust to your home’s specific temperature and humidity before it gets nailed down. This process, called acclimation, is one of the most important steps for preventing gaps or buckling later on. By letting the wood get comfortable in its new environment first, we ensure it will remain stable and secure for years to come.
What is the most common cause of problems with a new hardwood floor? Almost every major issue—from squeaks and hollow spots to gaps between boards—can be traced back to the subfloor. Your new hardwood is only as strong as the foundation it sits on. That’s why we spend so much time making sure the subfloor is perfectly clean, dry, and flat before we lay the first plank. Skipping this meticulous prep work is the single biggest mistake you can make.
Will my new floors have little grooves between the planks? That depends on whether you choose prefinished or unfinished hardwood. Prefinished planks are sanded and sealed at the factory and have a beveled edge, which creates those subtle lines. Unfinished wood is installed raw and then sanded on-site, resulting in a completely flat, seamless surface. For most homeowners who want a durable floor installed quickly, prefinished is the ideal choice.
How can I keep my new floors from getting scratched? The best defense is a good offense. The easiest way to prevent scratches is to place felt pads on the bottom of all your furniture—chairs, tables, sofas, everything. It’s also a great idea to use doormats at every entrance to catch the dirt and grit that can act like sandpaper under your shoes. Keeping your pets’ nails trimmed will also make a huge difference in protecting the finish.
Can I install solid hardwood in my kitchen or bathroom? We strongly advise against installing solid hardwood in any area with high moisture, like a full bathroom or a basement. Water is the biggest enemy of a wood floor and can cause it to warp, cup, or swell. While a properly sealed hardwood floor can handle the occasional kitchen spill if it’s wiped up quickly, it’s not designed for rooms that are consistently damp or prone to puddles.